Before I moved to Colorado, I was not drawn to desert hiking. My only real experience was hiking desert portions of the Pacific Crest Trail. I wasn't exactly blown away. Then I began to hike and mountain bike the more arid regions of Colorado and my opinion changed. The desert terrain has more interesting features in the Four Corners region compared to southern California on the PCT.
Last week Puma found a hard to come by breed of chicken that she has been trying to get. The chickens were in Fruita, some four hours away. She knew that I enjoyed the mountain biking in Fruita and easily talked me into making the trip. She knew I would find some outdoor fun, then pick up the chickens.
My activity of choice in the Fruita area would normally be mountain biking. However, February isn't exactly prime season. Recent rain left the trails less than idea for riding. There was an area that I wanted to hike however just outside of Fruita where mud would be less of an issue.
I never heard of Rattlesnake Canyon before I stumbled upon it on a map of Colorado. I looked it up online and read that it had the highest concentration of natural arches outside of Arches National Park. I saw some photos and was immediately interested. Rattlesnake Canyon sits just south of the Colorado River in Fruita and just north of Colorado National Monument in McInnis Canyons National Conservation Area. Much of my hike was within the Black Ridge Canyons Wilderness.
There are several ways to reach the arches. Many people reach the arches by a rough dirt road accessible only by four wheel drive vehicles. This option is closed in the winter months. A few access the canyon by hiking in from the Colorado River, which involves crossing the river at some point by boat or raft. The third option is to hike in from the Pollock Bench Trailhead, just outside of Fruita. This route involves more than twelve miles of hiking and nearly 3000' of elevation gain including climbing in and out of Pollock Canyon. This was my chosen route.
On February 22nd I left for Fruita just after 4AM and reached the Pollock Bench Trailhead just after 8AM. The trail, Trail P1, climbed from the parking lot and within minutes I saw some interesting scenery. The trail reaches the rim of Flume Creek Canyon and follows the canyon rim along the top of the red sandstone walls overlooking the canyon. Miles of sandstone walls are visible in the distance. As I continued, I approached numerous, smaller side canyons.
 |
| The trail near the beginning of the hike |
 |
| Early view |
 |
| Scenery near the beginning of the hike |
 |
| Looking at the red rock walls of Flume Creek Canyon |
 |
| The trail travels along the top of the wall |
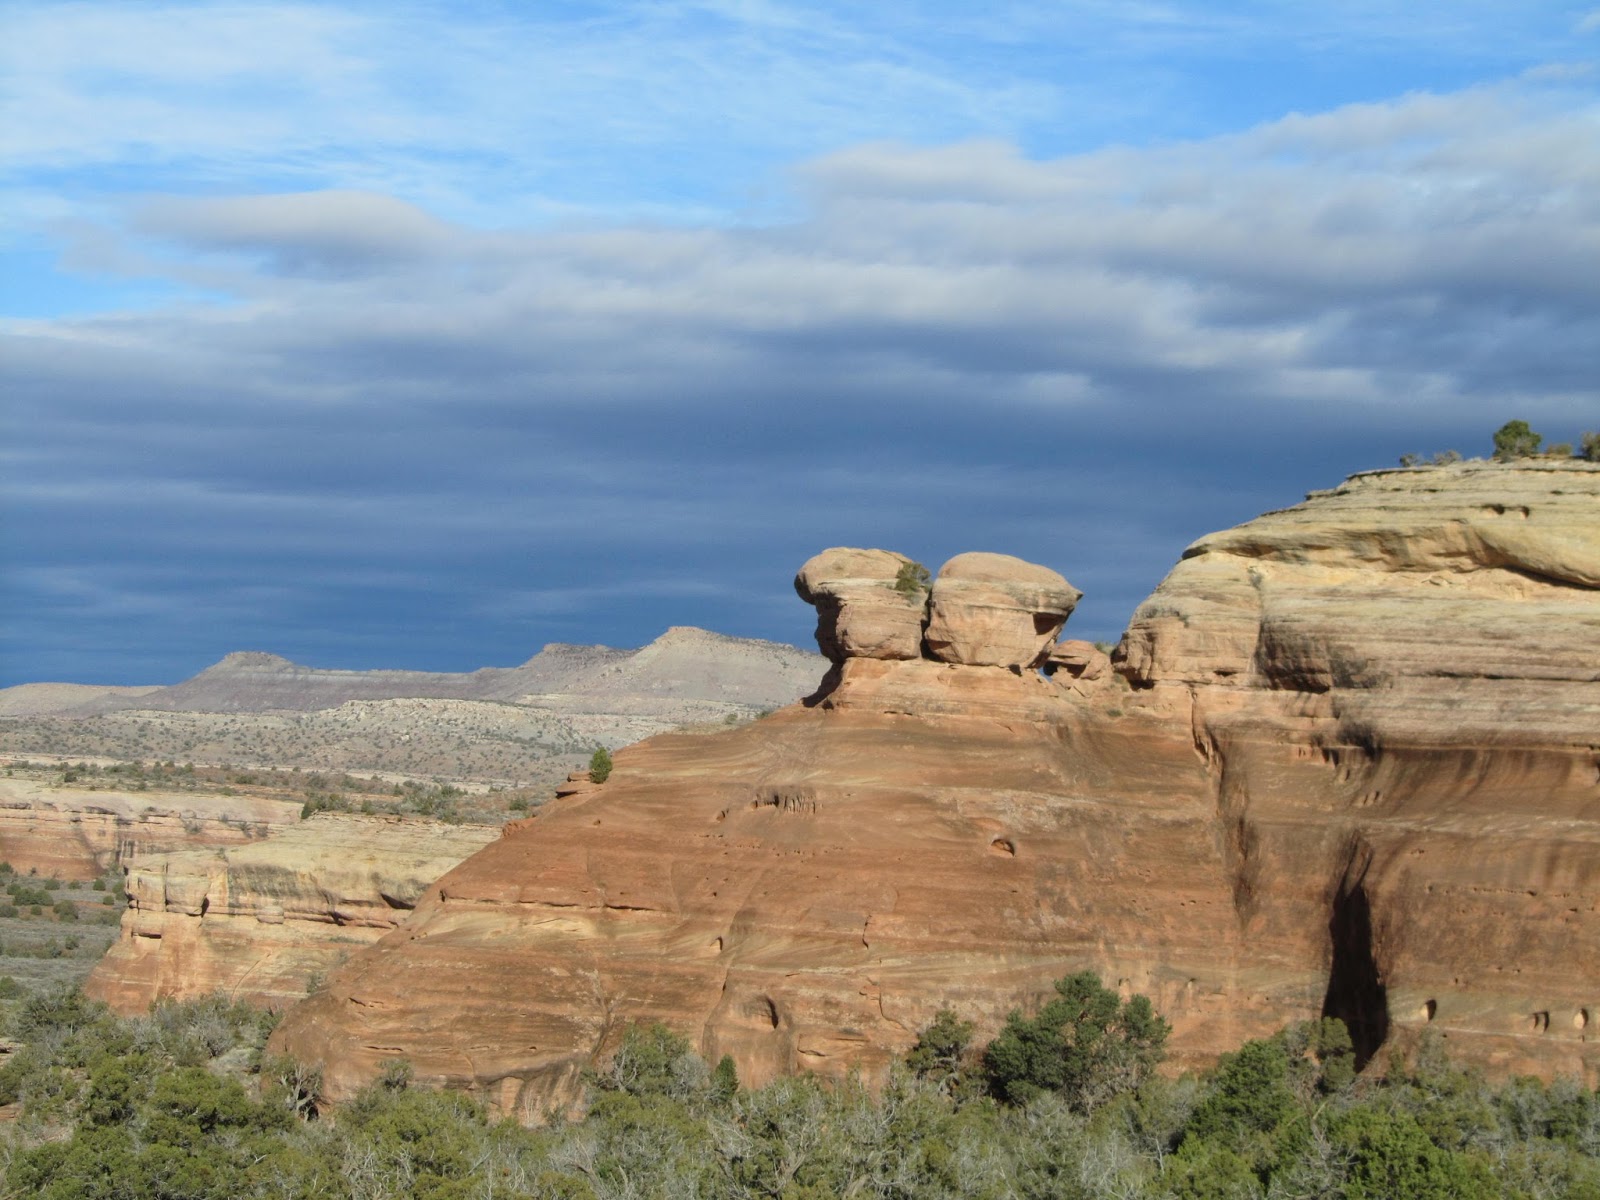
Leaving the Flume Creek Canyon rim, I headed toward Pollock Canyon. After two miles or so, you reach a junction and the trail begins its descent into the canyon. The trail is now Trail R1. As the trail drops, there are a few trickier spots as the route makes its way off the rim. Cairns usually mark the way where the route is more difficult to follow. As the route descends, the scenery becomes more interesting as the trail passes near interesting sandstone formations and spires.
 |
| A skull on a trail sign |
 |
| The first look into Pollock Canyon |
 |
| Rock formation on sandstone wall |
 |
| One of the fist looks at the sandstone towers |
 |
| A large sandstone formation |
 |
| A closeup view of some formations |
 |
| A good look at a tower |
 |
| A series of formations |
 |
| A look at the tower from a different angle |
 |
| Lots of features on this mesa |
 |
| The trail making its way toward Pollock Canyon |
 |
| Pollock Canyon |
 |
| Another group of towers |
Soon the trail begins its final descent to the floor of the canyon. On its final drop, there are several scrambles to downclimb. Although the trail is generally clear, I had to double check that I was on the correct path. The sand and rock trail isn't always straightforward.
 |
| Walking along the canyon wall |
After three miles or so, I reached the bottom of Pollock Canyon. There was actually some water flowing in it after the recent rains. The trail followed the canyon floor for a 1/4 mile or so and crossed the creek a few times before climbing out the other side.
 |
| Looking up-canyon |
 |
| Looking down- canyon |
 |
| The trail following the canyon floor |
The climb out of the canyon had some moments with tricky terrain. A few sections of loose rock were mixed with necessary scrambling up the rock. Cairns marked the route to keep hikers away from cliffs. As I climbed, there was some great scenery of Pollock Canyon.
 |
| Looking up-canyon on the climb out of Pollock Canyon |
 |
| The canyon walls (Filtered sunshine didn't allow for the best photo) |
 |
| Closeup of the canyon walls |
 |
| Traversing a slab on the climb out |
 |
| A section requiring scrambling |
As the trail continued away from the canyon, the trail levels out while traveling through sparse junipers. Traveling through the junipers, the great views continue. I reached more sandstone formations with numerous towers and spires. In the distance is one of the more interesting features. A tower called Window Rock Tower stands above a canyon wall. The tower has a large hole in the middle of it.
 |
| More sandstone features after Pollock Canyon |
 |
| Window Rock Tower in the distance |
 |
| Window Rock Tower |
The level travel was short lived. I soon followed the base of a sandstone cliff before climbing to higher ground above the cliff. The route continued to climb through junipers while taking in views of distant sandstone walls and canyons. To the north, sections of the Colorado River were visible as well as Fruita.
 |
| Walking toward a sandstone wall |
 |
| Window Rock Tower in the distance |
 |
| Interesting erosion |
 |
| Traversing under a large wall |
 |
| Looking back at the wall I just passed under |
The trail leveled out once again while following the base of yet another sandstone wall. This wall had numerous small alcoves and pockmarks from erosion. I soon saw a small hole in the cliff. Maybe not exactly an arch, but more akin to the hole in Window Rock Tower. Looking closer, it appeared to be three small holes side by side.
 |
| Looking across the canyons |
 |
| A trio of holes in the rock wall |
 |
| Numerous small alcoves |
I reached the end of the wall and the trail wrapped around the other side of it. As soon as the trail wrapped around the wall, the view overlooked Rattlesnake Canyon. While the arches in the area are the main attraction, Rattlesnake Canyon is quite impressive by itself. The canyon is quite deep with many layers. The walls of the canyon are sheer with high cliffs of colorful red sandstone. The walls are pocked with numerous alcoves and eroded features. I didn't even get to the arches yet and I was already impressed. The view of the canyon would have been a worthwhile trip by itself.
 |
| The view across Rattlesnake Canyon |
 |
| Haze over Rattlesnake Canyon |
The route travels immediately under the sandstone wall on a bench high above the canyon. There are numerous cliffs along the trail with great views looking into the canyon. The wall above the trail is quite impressive with beautiful striated, red sandstone.
 |
| Interesting patterns in the sandstone |
 |
| Another look in Rattlesnake Canyon |
Pretty quickly I saw numerous features in the wall. A room sized alcove came into view. In the roof of the alcove is a small arch. A short distance later, I reached the first big arch, Hole in the Bridge Arch. Hole in the Bridge Arch has a 40 foot span that rises some 30 feet above the ground. As its name implies, there is a hole on the middle of its span. After Hole in the Bridge, I passed other smaller arches and alcoves in the wall.
 |
| Large Alcove |
 |
| A small arch in the roof of the alcove |
 |
| Hole in the Bridge Arch |
Even without the arches, the trail is impressive in the area. The views of Rattlesnake Canyon continued the length of the trail. The color and textures in the wall are quite interesting . I stopped to take in the scenery of the canyon and the wall along the trail.
 |
| Another view into Rattlesnake Canyon |
 |
| A large Alcove |
 |
| Looking up Rattlesnake Canyon |
 |
| More interesting patterns in the sandstone wall |
 |
Looking back at the portion of the wall
I already passed under |
 |
| Looking at the striations in the wall |
Soon enough, I reached the biggest arch in the area. I found it listed as several names, most commonly Rattlesnake Arch, but also Centennial Arch and Akiti Arch. Whatever you call it, Rattlesnake Arch is quite impressive with a 40 foot span at a height of 120 feet. A couple of smaller arches are close to Rattlesnake Arch but easy to overlook with the bigger arch towering above.
 |
| A small arch |
 |
| A closer look at the small arch |
 |
| A tower in front of the arch |
 |
| Rattlesnake Arch |
 |
| Closer look at Rattlesnake Arch |
 |
| Rattlesnake Arch from below |
 |
| Tower in front of Rattlesnake Arch with interesting erosion |
Leaving Rattlesnake Arch, I continued to enjoy the scenery of both Rattlesnake Canyon and the sandstone wall above the trail. I photographed the walls interesting features, alcoves, and a couple minor arches before reaching the final arch, Cedar Arch. Cedar Arch has a span of about 75 feet and rises more than 40 feet in a classic arch shape.
 |
| Another look at the wall |
 |
| Hoodoo below the canyon rim |
 |
| Closeup across the canyon |
 |
| Towers along the wall |
 |
| Formations along the wall |
 |
| A small arch along the wall |
 |
| Looking into Rattlesnake Canyon |
 |
| Looking up at the wall |
 |
| Looking back along the wall |
 |
| Closeup look at the wall |
 |
| Large alcove |
 |
| Cedar Arch |
The official trail ends at Cedar Arch. From Cedar Arch, you can either retrace your steps, or climb through the arch to make a small loop. I chose to climb through the arch. Climbing through the arch is fairly tricky. The climb is quite steep. Although the sandstone allows for good traction, loose sand on the wall under the arch compromised traction at times. I don't recommend climbing through the arch for those uncomfortable with scrambling or afraid of heights. This is a class 4 scramble and once you begin, your committed. Downclimbing isn't an easy option. After you get above the arch, there is another tricky ascent to reach the top of the mesa. Once through the arch, it is possible to walk across the arch's span, although I don't recommend it.
 |
| Looking through Cedar Arch after climbing through it |
 |
| Cedar Arch from above |
 |
Hiking away from Rattlesnake Canyon with
Cedar Arch in the foreground |
There is no trail through the arch. A couple cairns lead to the Upper Rattlesnake Trail. Following the Upper Rattlesnake Trail will eventually lead you back to the original trail, R1, on the other side of the sandstone wall. Once back on R1 you retrace your steps back to the trailhead. On the return to the trailhead, you travel the same terrain, including the drop in and out of Pollock Canyon.
 |
| A view toward Fruita overlooking another canyon |
 |
| The wall I traversed under earlier with the three holes |
 |
| The view on the hike out |
 |
| Looking back toward Window Rock Tower on the hike out |
 |
| Passing a group of towers |
From the Pollock Bench Trailhead, this hike is around 13 miles. If you don't climb through the arch and backtrack by the arches, the hike is more than 15 miles. The trailhead sits at just under 4500' and the high point of the hike above Cedar Arch is just over 5700'. Don't let the modest elevation change mislead you. There is constant up and down between canyons and drainages and there is about 3000' of climbing from start to finish.
 |
| Pollock Canyon |
 |
| Descending back into Pollock Canyon |
 |
| Another look into Pollock Canyon |
 |
| Leaving the Pollock Canyon Rim |
My hike in February reached about 60F. In the summer this would be a tough hike. There is very little shade traveling through junipers and only occasional shade in the canyons. In summer it can get quite hot in this part of Colorado. Although some water flowed in Pollock Canyon two days after rain, this hike is usually dry, so bring plenty of water. Spring and fall would probably be the best times to hike. Wet weather would also make this a tough hike. There are sections of slickrock and scrambling that would be difficult on wet ground.
 |
| Looking toward Fruita |
 |
| Flume Creek Canyon |
 |
| Hiking along the Flume Creek Canyon Rim |
Hiking to Rattlesnake Arches is definitely a worthwhile trip. Even without the arches, the canyon views and sandstone formations make the trip worth the effort. The hiking season here is much longer than much of Colorado, which is covered by snow right now. In a state dominated by lofty alpine mountains, this is a good opportunity to see a different side of the Colorado Wilderness.
 |
| Window Rock Tower in the distance |
 |
| Hole in the Bridge Arch |
 |
| Rattlesnake Arch |
 |
| Cedar Arch |
 |
| Rattlesnake Canyon beyond Cedar Arch |
If you enjoy my blog check out and "like" Tomcat's Outdoor Adventures
Facebook page. It is updated more frequently with photos of recent and past outings.


